1. Comprehensive Photographic Documentation Standards
Leaving a rental property creates a unique set of pressures. You’ve packed your belongings, coordinated your move date, and now you face the critical task of documenting the property’s condition to protect your deposit and maintain your landlord relationship. Without proper end-of-tenancy inventory procedures, disputes over damages, missing items, or cleaning standards can turn what should be a clean break into months of frustration and financial loss.
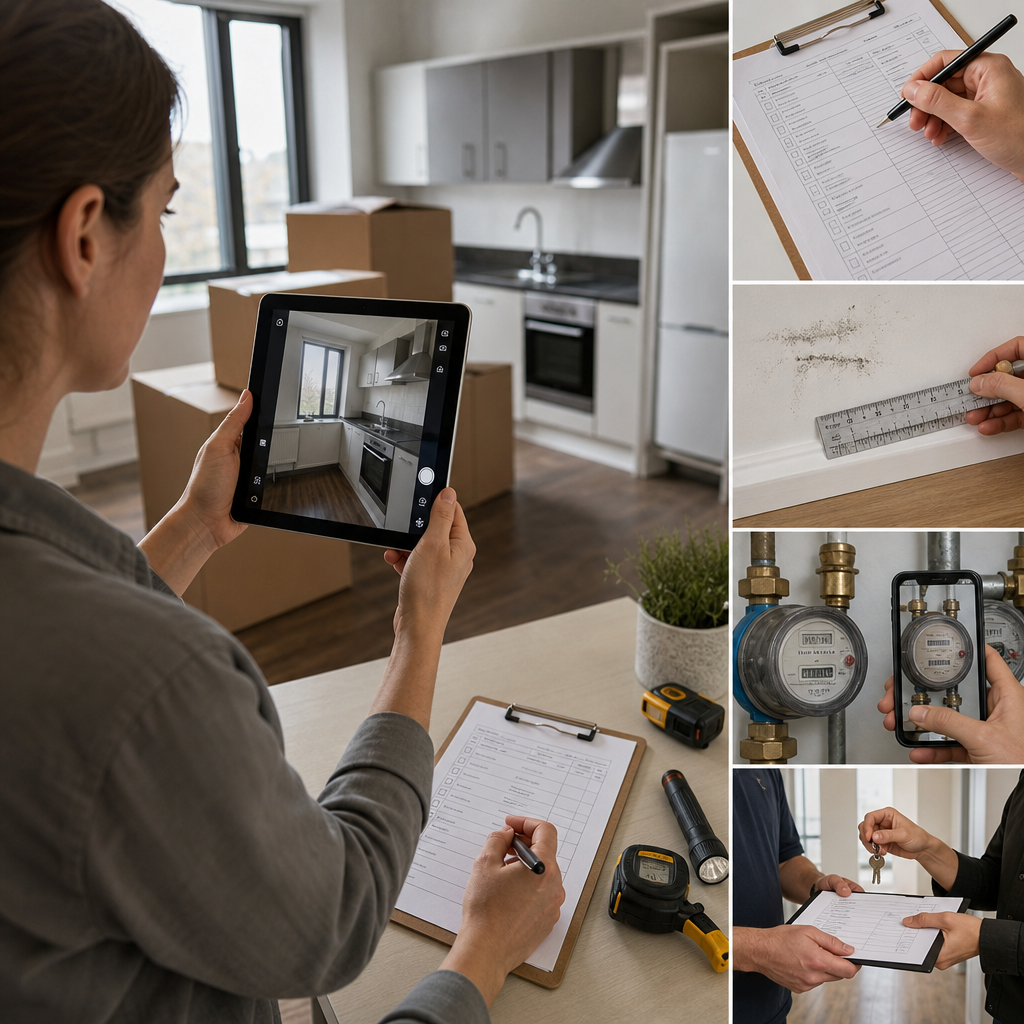
We’ve guided hundreds of tenants through this process at Quickshift Removals, and we’ve learned that the difference between a smooth move-out and a contentious one hinges entirely on documentation. This guide walks you through eight essential procedures that transform move-out documentation from a stressful afterthought into a straightforward, defensible process.
Photography serves as your primary evidence in any deposit dispute. A single photo of a clean hallway proves far more than your word ever could. Start by establishing consistent lighting and angles across all rooms. Natural daylight works best, so schedule your documentation session during daylight hours when rooms are naturally lit. Cloudy days often provide the most even lighting without harsh shadows that obscure details.
Photograph every surface systematically. Take wide shots showing the entire room from multiple corners, then capture close-ups of specific areas: walls for marks or damage, flooring for stains or wear, fixtures for functionality, and appliances for cleanliness. Don’t skip small details like light switches, door handles, and skirting boards where grime accumulates.
Include timestamp metadata on all photos. Modern smartphones embed this automatically, but verify this feature is enabled. If you’re using a camera without metadata, note the date and time of each session in writing alongside your photo collection. Video documentation adds another layer of protection. A slow walkthrough of each room, narrating as you go, creates irrefutable evidence of condition on your move-out date.
For bathrooms and kitchens, prioritize tight shots of grout lines, corners, and hidden spots. These areas generate the most disagreement about cleanliness standards. Photograph inside cabinets, under sinks, and behind appliances. If anything was broken or dysfunctional before your tenancy, photograph that too with a note explaining the pre-existing damage.
Action takeaway: Schedule your photography session for the morning after you’ve completed your final clean, before removing the last of your possessions. This captures the property in its true move-out condition.
2. Digital Inventory Management Systems and Tools
Paper checklists get lost, damaged, or disputed. Digital inventory systems create searchable, timestamped records that survive scrutiny. Cloud-based platforms offer the security and accessibility you need when managing tenancy documentation across months or even years of potential disputes.
Specialized inventory apps like RoomSketcher, Propertymark, or Tenancytrack allow you to create detailed digital inventories linked directly to photos. These platforms automatically log when entries were created and modified, providing evidence of authenticity. Some systems generate formal reports acceptable to tenancy dispute services, which carries legal weight if your case escalates.
A spreadsheet template works if you prefer simplicity. Create columns for room, item, condition, date documented, and photo reference number. Use consistent terminology when describing condition: pristine, good, fair, damaged, or missing. Vague descriptions like “okay” create ambiguity that works against you in disputes.
Store all digital records across multiple platforms simultaneously. Cloud storage through Google Drive, OneDrive, or Dropbox ensures you retain access even if one service experiences problems. Create backups of your documentation on an external hard drive as well. When your move-out date arrives, you’ll have redundant copies protecting your interests.
Consider using numbered photo references that cross-link to your inventory spreadsheet. Photo 0001 might be “Kitchen Overview,” cross-referenced to row three in your spreadsheet under Kitchen. This organization system saves hours when you need to locate specific evidence months later.
Action takeaway: Choose either a specialized inventory platform or a simple spreadsheet, but commit to using it consistently for every room and item. Consistency is what makes your documentation legally compelling.
3. Room-by-Room Condition Assessment Methods

A systematic approach prevents oversight and ensures completeness. Begin with a standard assessment form that treats every room identically. This consistency makes your documentation harder to challenge.
Start with the entryway, including the front door itself. Note its condition, whether it locks properly, and any damage to the frame. Move through the property clockwise, documenting each room in the same sequence every time. This creates a logical narrative of the property’s condition.
For each room, assess walls before flooring before fixtures. Note any marks, stains, dents, or damage to paintwork. Use a flashlight to inspect corners and behind furniture where issues hide. Flooring assessment should include carpets (stains, burns, wear patterns), hard flooring (scratches, chips), and the condition of baseboards. Photograph carpet pile in good condition for comparison against any future claims of excessive wear.
Check every fixture and fitting. Test light switches, radiator valves, and door handles. Open and close all windows and doors, documenting whether they function smoothly. In kitchens, inspect appliances inside and out: oven cleanliness, refrigerator operation, extractor fan function. Ensure cabinet doors close properly and shelves are intact.
Bathroom assessments should include tile condition, grout discoloration, mirror spots, and tap function. Document water pressure in showers and baths. Check sealant around baths and shower enclosures for mold or deterioration that existed before you moved in.
Create a condition scale: 1 (pristine), 2 (good with minor wear), 3 (fair with notable use), 4 (damaged), 5 (missing). Record the scale code rather than subjective descriptions. This removes ambiguity when disputes arise.
Action takeaway: Allocate two to three hours for a complete assessment. Rush the process and you’ll miss details that could cost your deposit later.
4. Damage Classification and Recording Protocols
Not all damage carries equal weight in deposit disputes. Your task is classifying damage so clearly that no reasonable person disputes the distinction between normal wear and tenant damage.
Normal wear and tear includes slight paint fading, carpet color change from foot traffic, minor scuffs on skirting boards, and small dents in walls. Photograph these alongside a measurement scale (place a coin in the photo) so viewers understand the damage’s actual size. What seems dramatic in a photo might be a tiny mark in reality.
Document tenant-caused damage separately and thoroughly. Broken windows, large dents, stains, burns, gouges, or broken fixtures fall here. Include close-ups showing the damage’s extent and any surrounding context. If damage occurred from normal use but exceeds reasonable expectations (a large stain in bedroom carpeting, for instance), classify it conservatively and photograph thoroughly.
Pre-existing damage requires special attention. If your tenancy agreement included a pre-existing damage schedule, photograph those specific items again, confirming their condition hasn’t worsened. If no pre-existing schedule exists, photograph any damage you inherited from previous tenants. Note the date of discovery in your move-out documentation.
Use consistent terminology across all documentation. If you describe a wall mark as “scuff” in your inventory, don’t later call it a “crack.” Terminology consistency strengthens your credibility.
For each damaged item, record: location (e.g., “Master Bedroom East Wall”), damage type (e.g., “Dent”), damage classification (normal wear or tenant damage), dimension or severity, photograph reference numbers, and date. This granular documentation makes disputes virtually unwinnable for landlords with weak evidence.
Action takeaway: When in doubt about damage classification, err on the side of thorough documentation rather than dismissal. Extra photos never hurt; missing evidence always does.
5. Utilities and Meter Reading Documentation
Utility accounts require careful final documentation. Meter readings serve as your evidence that you’ve settled all consumption responsibility and haven’t left outstanding usage unpaid.

Record gas, electricity, and water meter readings on your move-out date, ideally in the morning before you leave. Photograph the meter display clearly, ensuring the numbers are legible. If your property has a smart meter, take a screenshot of the final reading from your online account portal. Include the date and time stamp shown on your meter.
Request final meter readings from your utility suppliers if readings don’t appear immediately in your online accounts. Gas and electricity providers typically process final readings within five working days of your move-out date. Water companies take slightly longer since they meter usage quarterly in most cases.
Document the contact you made with each utility company. Save emails confirming your move-out date and final readings. If you received closure notices or final bills, file these with your move-out documentation. These documents prove you settled your account responsibly.
Check that you’ve switched off or arranged disconnection of services you installed: internet, landline, security systems. Document that disconnection in writing with your providers. If you move before a contracted end date, document how you’ve settled any early termination fees.
This utility documentation protects you from landlord or property management company claims that you left services running or consumed unpaid utility costs after your move-out date.
Action takeaway: Schedule your final meter reading for the morning of your departure, photograph it immediately, and request written confirmation from utility providers within one week of moving.
6. Third-Party Inventory Reports and Witnesses
Independent documentation carries more weight than self-documentation. Professional inventory clerks or neutral witnesses provide the objective evidence that disputes heavily favor.
Professional inventory companies can conduct a formal check-out inventory assessment. They photograph the property, complete detailed condition reports, and provide signed documentation of findings. These reports hold particular weight because they come from someone without financial interest in either party’s outcome. The cost typically ranges from 100 to 300 pounds depending on property size and complexity.
If professional reports aren’t in your budget, request that your landlord conduct the inventory assessment with you present, or arrange for a friend or family member to witness your documentation process. Ask them to take photos on their phone as well, creating independent documentation of the same moment. While less formal than professional reports, multiple documentation sources from different people strengthen your position significantly.
Some tenancy agreements require the landlord to conduct a joint final inspection. If this applies to your tenancy, document your requests for this inspection in writing and keep records of all communication. If your landlord refuses to participate in the inspection despite your requests, document this refusal in writing.
If witnesses observe the property condition with you, ask them to sign and date a statement confirming what they observed. A simple statement like “I visited the property at [address] on [date] and observed its condition as documented in these photos” provides supporting evidence if disputes arise later.
Action takeaway: Arrange for either a professional inventory assessment or a neutral witness to accompany your documentation process. The cost or effort pays dividends if deposit disputes arise.
7. Digital Evidence Organization and Storage
Documentation only protects you if you can locate it when you need it. Proper organization means finding specific evidence in seconds rather than searching through hundreds of disorganized files.
Create a dedicated folder structure using consistent naming conventions. Example structure: Year_Month_Property Address / Room Name / Specific Item or Area. This hierarchy makes searches intuitive even after several months pass. Inside each folder, number photos sequentially (001, 002, 003) so you can reference them by number in your inventory spreadsheet.
Create a master index document listing every photo by number with its description, location, and condition noted. This index becomes your quick reference guide, eliminating the need to open hundreds of image files when searching for specific evidence.
Consolidate all supporting documents into a single PDF bundle. Include your inventory spreadsheet, photo index, utility documentation, witness statements, professional inventory reports, and correspondence with your landlord or property management company. Name this file clearly: “Move-Out Documentation_[Property Address]_[Date].”
Store this complete bundle in at least three separate locations: one cloud storage service, a second cloud storage service, and an external hard drive. If one location becomes inaccessible, you retain redundant copies. Email a copy to yourself as additional backup; emails are archived and retrievable for years.
Include a summary document at the beginning of your PDF bundle listing what’s included, the property address, your tenancy dates, and the move-out date. This summary allows anyone reviewing your documentation to understand what they’re looking at immediately.
Action takeaway: Dedicate one hour to organizing your documentation immediately after your move-out photos and assessments are complete. Neglecting this step often means losing crucial details by the time disputes arise.
8. Final Handover Documentation and Sign-Off
The moment of handover is when your documentation converts from personal record to contractual evidence. How you conduct this final exchange significantly impacts its later enforceability.
Provide your landlord or property manager with a copy of your move-out documentation, typically via email with delivery receipt requested. Include a brief cover note stating that you’re providing this documentation as evidence of the property’s condition on your departure date. Retain the delivery receipt as proof of when you provided it.
Request that your landlord acknowledge receipt of your documentation and confirm the property’s condition on your departure date. This acknowledgment strengthens your position should disputes arise. Even if your landlord disagrees with your assessment, their acknowledgment of what they received proves you acted transparently and professionally.
Obtain written confirmation of your final move-out date from your landlord or property management company. This prevents later disputes about when your tenancy actually ended or when your responsibilities ceased.
Keep all keys, access cards, and entry devices until you’ve received written confirmation that the property handover is complete. Return keys formally, ideally with a receipt confirming return. If you return keys by post, use recorded delivery and retain the proof of delivery documentation.
If disputes later arise over deposit deductions, your documented handover becomes the baseline evidence against which the landlord’s claims are measured. Clear documentation showing the property’s condition on your departure date makes it extremely difficult for landlords to claim additional damage or poor condition occurred on their watch before you left.
Request that your deposit is returned within the timeframe specified in your tenancy agreement, typically 30 days after move-out. If no return occurs within that timeframe, document your follow-up requests in writing and escalate to your local authority’s deposit scheme administrator if necessary.
Action takeaway: Conduct your handover in writing rather than verbally, retain all receipts and confirmations, and don’t consider the move complete until you’ve received written confirmation of your deposit return.
Moving from a rental property shouldn’t mean sacrificing your deposit to disputes that proper documentation could prevent. At Quickshift Removals, we understand that successful moves depend on far more than just transporting your possessions. They depend on managing the administrative details that protect your interests throughout the process.
When you move with us, we coordinate seamlessly with your move-out timeline, handle your belongings with care, and ensure you’re free to focus entirely on completing your tenancy documentation properly. Our team at Quickshift Removals has supported countless London residents through move-outs that proceed without deposit disputes or complications because they handled these procedures methodically.
The eight procedures outlined here represent the gold standard in move-out documentation. They transform what many tenants treat as an afterthought into a defensible, organized process that protects your financial interests and maintains professional landlord relationships. Whether you’re relocating locally or internationally, apply these procedures to every property you leave, and you’ll move forward with confidence that your deposit is secure and your responsibilities are fully documented and settled.
For further reading: Moving FAQs, Removals and Storage.
